Showing posts with label sweet biteums. Show all posts

Sunday, June 10, 2012

"Go Right Ahead"


There are times in this life when things get embarrassing.  When you're out for a run and a stranger in a slow moving car hears you scream to yourself "COME ON WOMAN! YOU CAN DO IT!"... and they give you a look... like you must be a hobo. These are the times when wearing a ski mask in public, seems like a good idea. But there are also times to be proud. Like when you figure out the answer to a problem that's been plaguing  you, and you want to do a happy dance.

I've experienced both of these feelings this week. 

My shame; yes I talk to myself in public, and no, this is not the first time I've been caught.
My pride; I have found the holy grail of dairy free baking. Home made sweetened condensed coconut milk. 
It will change your life. It'll give you pride and if you're like me, it'll make you scream "EUREKA!" while doing a happy dance (and you won't even care who's giving you the eye!).


I will however confess, that while it did provoke a happy dance, it took me three tries to get this right. It isn't hard to do if you know what to expect, but in the throws of whisking I kept doubting myself. Is it thick enough yet?*whisk whisk whisk* Am I burning it up?* sniff sniff whisk* If it gets thicker when it cools is this thick enough? * whisk whisk whisk*  My first try I kept the heat way too low, and after an hour it hadn't really changed consistency at all. I figured I was just stupid, tried to use it anyway and ended up with a sort of soupy mousse situation. Fail!

My second try was in the middle of the night, which should have been my first clue that this wouldn't work out. I used raw sugar because that's all I had in the house, and since I  was headed to bed once I got done with the cook stage I just stuck the whole thing in the fridge to use in the morning.

 Don't be like me and make either of these choices.

 The raw sugar tinted everything a brownish golden hue, and the fat separated from the milk in the refrigerator over night, making an floating iceberg of coconut oil. When creaming my batter together I thought to myself, eh it'll all come out in the wash but alas this was not the case and the finished product was speckled with islands of coconut oil. Ew. 

By my third try I was a seasoned pro. I got a nice comfortable bench to sit on, and set myself up with some wifi action. I nursed the creamy dreamy coconut milk while it simmered a full forty five minutes, until it left streaks in the pan when I ran my whisk through it, was the consistency of yogurt, and just the slightest bit nutty smelling.

I let it sit until it was room temperature, and from there ignored my lazy urge to deal with it later and made the pie filling right away. This time everything was perfect. All the aspects of a key lime pie that I love and remember, no sacrifices, no excuses. Perfect texture, perfect taste, total elation. 

Strangers of the world, warm up your stink eye, because you better believe that I'm causing a scene!
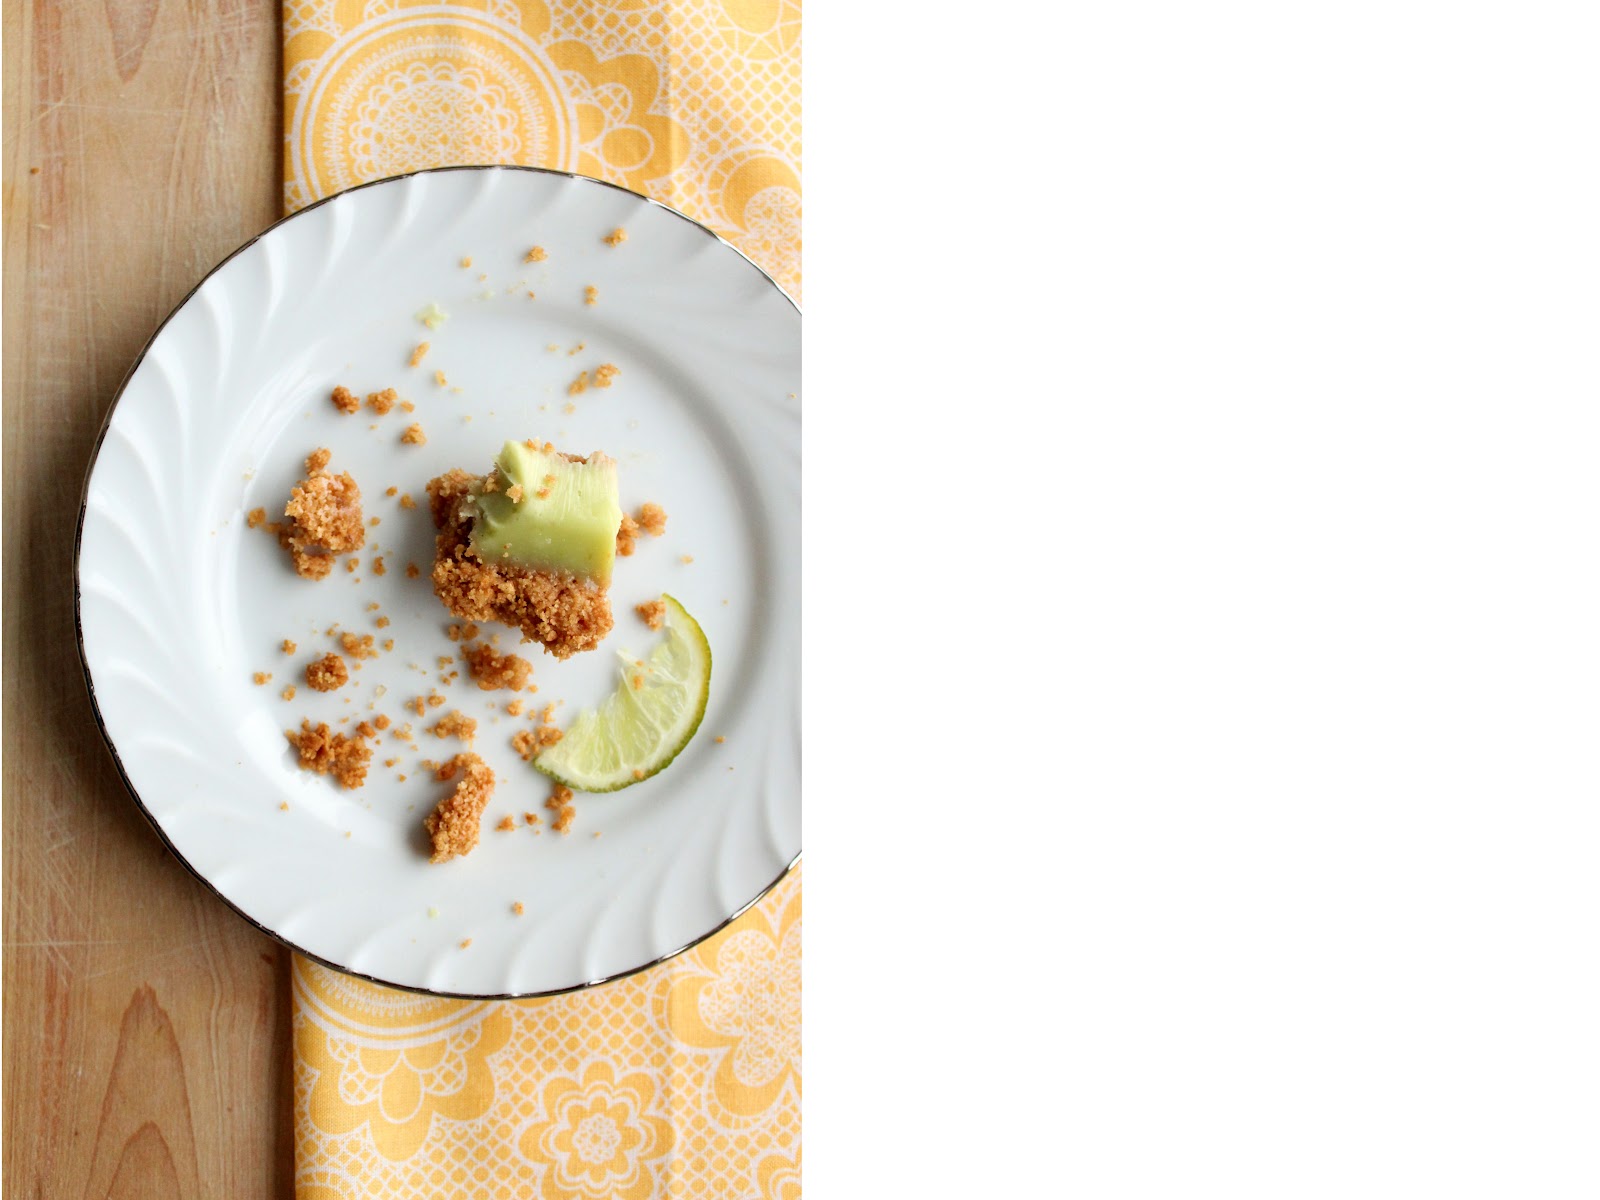

Dairy Free Key Lime Pie

This is admittedly a little labor intensive to produce, you have to stand over a hot sauce pan whisking every moment or two for forty five minutes, but the results are beyond worth it. It's an equal swap for  sweetened condensed cows milk, wonderfully undetectable, and look, it makes cream pies!


Sweetened Condensed Coconut Milk

2 (13.5 ounce) cans of  unsweetened coconut milk ( I used Thai Kitchen brand)
1/2 cup caster sugar

Add two cans of coconut milk and a 1/2 cup of sugar to a heavy bottomed sauce pan, and simmer on medium low heat (whisking frequently to avoid any lumps) for about 45 minutes until the mixture thickens and has reduced in volume by about half. Trust yourself on this, there is a visible difference between what you started out with and and the finished very thick yogurt like end product. If after 45 minutes it still seems too runny, just keep on simmering until it reduces.


Let cool to room temperature before using.

Crust

12 whole graham crackers
5 tbsp shortening
4 tbsp coconut oil
3 tbsp light brown sugar

Preheat oven to 325 degrees. In the bowl of a food processor add 12 whole graham crackers and pulse until you have medium-small crumbs.

In a mixing bowl combine 5 tbsp shortening, 4 tbsp coconut oil, 3tbsp of light brown sugar and the graham cracker crumbs. Fold mixture together with a rubber spatula until the crumbs are evenly coated with the oil mixture. Press crust into the bottom and sides of a 9 1/2 inch pie plate, bake for 10 minutes until golden brown. Let cool to room temperature before filling. Leave oven on.

Pie


4 large egg yolks
the zest of one lime
1/2 tsp vanilla
1/4 cup + 2 tbsp key lime juice
Sweetened condensed coconut milk

In a large mixing bowl, cream together all ingredients, whisking well to smooth out any lumps.
Bake at 325 for 15 minutes, center will still be jiggly. Set on a cooling rack until the pie is cool to the touch ( about room temp).Chill in the fridge until set, at least four hours or overnight. Slice and enjoy!

Tuesday, May 8, 2012

"Shadow Stabbing"


Ever since I started this whole dairy-less deal I've found myself wrestling with a few problems, the largest one being the absence of butter. I've found that for many things there are a few decent swaps but it doesn't often go undetected. I prefer things to taste good regardless of what it is that went into baking them and butter substitutes often end up with their end products tasting that sort of oh this is pretty good for not having butter kind of way which to me is sign of low quality. Over the school period I made a great many unblogged dairy free Frankenstein type recipes trying to punch this problem square in its ugly face. This cobbler I think is my victory round.


Blueberry Peach Cobbler
originally by The Full Woman

Blueberry Peach Filling

12 ounces frozen blueberries (about 1 3/4 cups), thawed and drained of excess juice
16 ounces frozen sliced peaches (about 2 cups), thawed and drained
1tbsp cinnamon
1 cup sugar
1/2 cup all purpose flour
1/4 tsp salt


Add all ingredients to a large mixing bowl and toss to combine. Spoon into a 9 inch pie plate and cover with vanilla almond topping, recipe below.

Vanilla Almond Topping

1 egg
1/4 cup sugar
4 tbsp coconut oil, room temp
1/2 tsp vanilla
1/4 cup almond milk
1/2 cup all purpose flour
3/4 cup almond meal
1 1/2 tsp baking powder
1/4 tsp salt


In a large mixing bowl whisk together egg, sugar, coconut oil vanilla extract and almond milk until smooth. Add flour, almond meal, baking powder and salt and whisk until just combined. Spoon over pie filling and bake at 375 degrees for 40 minutes, until golden brown and delicious. Serve warm or cold (my favorite!) topped with almond dream ice cream.

Thursday, March 8, 2012

"Peanut Butter Fudge Chocolate Chip Pie" or "How To Ace Your Nutrition Midterm"


I'm pretty sure that before this week I never truly understood the terms "spring break" or "midterm exam". I'd heard them thrown around a lot before but until I started college, the meaning was completely lost on me. Last week was madness, I thought about nothing but the human digestive system, glucose, fructose, galactose, tryglycerides, amino acids and omega 3s. I started calling my boyfriend a monosaccharide to get on his nerves if he tried to talk to me while I was studying (as a joke) but struggled to remember to call him by his proper name when I wasn't studying. Things got ridiculous, so ridiculous in fact that I have no idea how in the midst of all that nutrition cramming I managed to come up with this chocolate explosion of a recipe.


My boyfriend's birthday happened to fall on the day after my last midterm exam. I asked him what he would like to eat since he's an freak and a cake hater, and he asked for chocolate cream pie (again) which was kind of a problem because of my dairy restriction but I had other things to worry about (my test!) so I put solving that problem on the back burner. Like way in the back burner since I didn't really bother to think about it until it came down to the wire.


When the day actually came for me to produce this dessert I started to worry when a quick search determined that my best bet was some melted chocolate swirled around with some silken tofu. Um, tofu? Really? How was I going to get my boyfriend to eat that? It didn't even sound like something I could trick myself into eating. But it was my only hope, so I would trust the vegans and lie to my boyfriend.

My mind raced trying to think up ways I could stealthily pull this off.

I would go shopping while he was asleep of course, and hide the tofu away in the fridge,and sneak the empty containers out to the dumpster so he'd never know they were involved. Then, I'd change the pie around a bit, maybe some smores action. A little graham cracker crust, maybe some marshmallows on top. Yeah, yeah this was sounding good.

So I  waited until he was asleep,ran out to the store, gathered my disguises and headed back to the apartment to get stared on my evil scheme. Things were going well until I realized that the graham crackers I'd bought for the crumb crust were expired. Like way expired. You can smell how rancid they are when you open the package kind of expired.

I was... upset.
I had about a sliver of a window before he woke up where I could deal with this whole tofu madness and I did not have time to go running back to the store.


My overstimulated textbook brain spiraled into  a problem solving mode fueled by stress, nutrition facts and rage.

 I may have blacked out.

I have memories of growing three times my size, breaking free of my t-shirt and jeans, and ransacking my kitchen pantry in a fit of amazonian fury. But I can't be sure what truly went down.

All I know for sure is that when I came back to my senses these little miniature peanut butter fudge chocolate chip pies were daintily chilling in my fridge and I may or may not have been laying on the kitchen floor in my alltogether atop a pile of rags that used to be my clothing.


Pin It


The pies, however it was that they came to be, were a hit. Tofu or no there is so much going on that even the most stuck up of boyfriends would never be the wiser. Chocolate and peanut butter atop a crispy chocolate chip cookie crust, who's going to argue? The pies disappeared about as quickly and mysteriously as they came into being. 

Happy Birthday Alan, I totally meant to do that. I think.


Peanut Butter Fudge Chocolate Chip Pie (dairy free, egg free,gluten free)

For the Chocolate Chip Cookie crust

1 cup Earth Balance dairy free butter
1/3 cup caster sugar
1/2 cup brown sugar
1/2 tsp vanilla
1 flax egg (1 tbsp ground golden flaxseed + 3 tbsp boiling water left to sit for 10 minutes)
1 cup All purpose gluten free flour mix* (learn how to make your own here)
1 1/8 cup sweet white rice flour
1/2 tsp baking soda
1/2 tsp salt ( omit if using salted dairy free butter)
1/2 cup dairy free chocolate chips (I used Enjoy Life Semi Sweet chocolate chips)

1. In a large mixing bowl cream together butter, sugars, vanilla and the flax egg until well combined and fluffy.

2. in a separate bowl sift together the flours, baking soda and salt. Add the dry ingredients into the wet and stir until just combined. Fold in the chocolate chips.

3. Divide the dough into four equal portions, and press into the bottoms of four 5" ramekins, making sure to work the dough up the sides to form an even crust. Poke all over with the prongs of a fork (so it doesn't puff up in the oven). Chill in the refrigerator for 30 minutes.

4. Preheat oven to 350 degrees, and bake for 12-14 minutes ( until it's the level of crispiness you like, or don't bake it at all  since there's no egg and leave it cookie dough if you like!). Let cool for at least 20 minutes before adding the filling.

* for my GF AP flour mix I used sorghum+teff+brown rice for my grains and tapioca+potato+sweet white rice for my starches

For the filling

13 ounces semisweet chocolate chips ( I used Enjoy Life semi-sweet chocolate chips)
1/3 cup coffee liqueur ( I used 1/4 cup homemade vanilla extract and 3 tbsp freshly brewed coffee)
1 teaspoon vanilla extract
1 pound silken tofu, drained
1/3 cup creamy peanut butter
1 tablespoon honey (or more to taste)


1.In a double boiler, or a large microwave safe bowl add the chocolate pieces and the coffee liqueur and melt until creamy and smooth.

2. Add melted chocolate, vanilla extract, silken tofu, peanut butter and honey to the bowl of a food processor and process until smooth. Divided into the four prepared pie crusts and let chill in the fridge for at least an hour (or more) before serving.

Tuesday, February 14, 2012

"If You Can't Be With The One You Love Honey, Love The One You're With"


Hello very inconvenient and random dairy allergy! Happy Anna Howard Shaw day to you! 
What's that? Why am I not the grumpiest person alive when I find myself having to cut out dairy for the two weeks that fall right on top of the most chocolaty day of the year? Why, because I have these shockingly delicious dairy free chocolate cupcakes!

Oh, and P.S. Mr. Dairy Allergy? SUCK IT! WE ARE NOT FRIENDS!


It has come to my attention that dairy seems to be triggering my eczema, which isn't at all inconvenient since it's not like I'm in cooking school or anything. Oh, wait! 

The alternative though is walking around looking like Tyrone Biggums which isn't exactly good for business eitherSo I've found that my only choice right now, at least until all this calms down, is to go completely dairy free, and possibly have periods when I'm dairy free in the future.

So... you know what that means! More stuff to learn!


The very first thing I thought about when the universe presented me with this obstacle was "Oh no! How am I going to bake?!?!" But after a little googling my second thought was "Thank god! There are vegans!" Vegan's pretty much rule half the internet, in fact I'm pretty sure that if we lived in a world without vegans, my quest to learn about dairy free baking would have taken about a hundred years longer. Sure there are other people out there with allergies with knowledge to share, but vegans are passionate! They will find a way to do whatever they want without dairy and they will tell you about it! It's amazing. I love you vegans! Go ahead, lay your knowledge on me!


As it turns out there are all kinds of ways out there to bake tasty delights and what's wonderful is that my gluten free knowledge fits right in with my dairy free knowledge. Honestly if I hadn't taken the time to really delve into the archives of The Gluten Free Girl I never would have thought it would be so easy to modify recipes to fit your lifestyle and your dietary needs. Shauna's focus may be on gluten free baking because that's the obstacle that she has, but she is a wonderful inspiration and advocate for modifying recipes to find what works for you.  And guess what, the cupcake recipe I used today, is my handy work! I started off with a recipe from Martha Stewart and then I tore it to pieces and reconfigured it using all the new stuff I've learned.

And it is DELICIOUS! Crazy good! Moist with that soft fat crumb you want from chocolate cake, and total yumtown. Not like "oh this is pretty good for gluten free" or  "this is surprisingly digestible for something with no butter in it" but actually real world no comparisons necessary mmmm chocolate cake tasty. And it is liberating and shocking to be able to bake this way! I want to kiss Shauna's feet for teaching me! And I want to kiss the vegans too!


Happy Anna Howard Shaw/Valentine's day everyone!
 Kiss the one you love! Kiss Shauna James Ahern! Kiss a vegan!
Slap an allergy in the face and bake some cupcakes!

Gluten Free/ Dairy Free/ Egg Free Chocolate Cupcakes
Originally Martha Stewart but cut to pieces, also you can find the dairy free butter cream icing recipe here

Pin It


2 tablespoons golden flaxseed meal soaked in 6 tablespoons of water for 15 minutes
3/4 cup warm water
3/4 cup soymilk + 1 tsp cider vinegar (left to curdle for ten minutes)
3 tablespoons coconut oil, melted
1 1/2 cups sugar
1tsp vanilla extract
3/4cup unsweetened cocoa powder
1 1/2 cups Gluten Free All  Purpose Flour Mix *
1 1/2 tsp baking soda
3/4 tsp baking powder
3/4 tsp salt

1. In a large mixing bowl cream together flaxseed mixture, warm water, soymilk mixture, coconut oil, sugar and vanilla extract until combined.
2. In a separate bowl sift together cocoa powder, flour, baking soda, baking powder and salt.
3. Add the dry mixture into the wet mixture a little at a time and whisk until it is well combined and there are no more lumps. It'll look pretty soupy at this point but if you let it sit for five to ten minutes it'll thicken up.
4.Divide into a paper lined cupcake tins and bake at 350 degrees for 20-25 minutes until it passes the skewer test.
Let cool 30 minutes and serve topped with butter cream icing and sprinkles.

Makes 18 cupcakes

* for my GF AP flour mix I used sorghum+teff+brown rice for my grains and tapioca+potato+sweet white rice for my starches

Wednesday, February 8, 2012

"On The Road To Insufferable" or " Say, Have You Done Your Homework Yet?"


I am becoming absolutely, ridiculously, crammed full of food knowledge. And I'm not just talking about school. No, this is a self induced condition, and for some reason I just can't help myself.

It started out innocently enough, I was just peeking at some gluten free flour prices on amazon.You know, the moon rocks. But somehow, and I don't quite remember how this came to be, I am now living in an apartment with a  digital food scale, a digital SLR camera and about 30 pounds of gluten free flours. 

I have a problem, I know.

It's this insanely counterproductive way I have of coping with stress; I become obsessed with learning really involved other things when I find myself absolutely swamped with work. I say "other" because it's always something that will not help me with my main task in any way. You'd think that at a time when my life is very busy (quite possibly the busiest its been in years) I would want to maybe spend any free moment just relaxing, you know, watching X files reruns with my eyes half open while reciting all the dialogue. But instead I find myself cultivating a list of strange hobbies - gluten free baking, dairy free baking, ratio baking, manual dslr photography and imperial to metric weight conversions (in my head) - with X files on in the background.

Because apparently, I love pain.


To make things worse, even though I'm talking about this ( you know, laughing at myself) I'm still completely lost in the madness. Don't let me fool you.

The recipe I made today isn't only gluten free.

 Oh, no. 

It's flourless. 

Yeah. Because we're doing that now too.


I find myself wondering if I'll drop dead come the end of the semester; brain grown too large for its container. 

But then again, that could just be the X files talking. 

Either way it does sound like something I might want to google... you know... because there could be something there... to learn about...

*

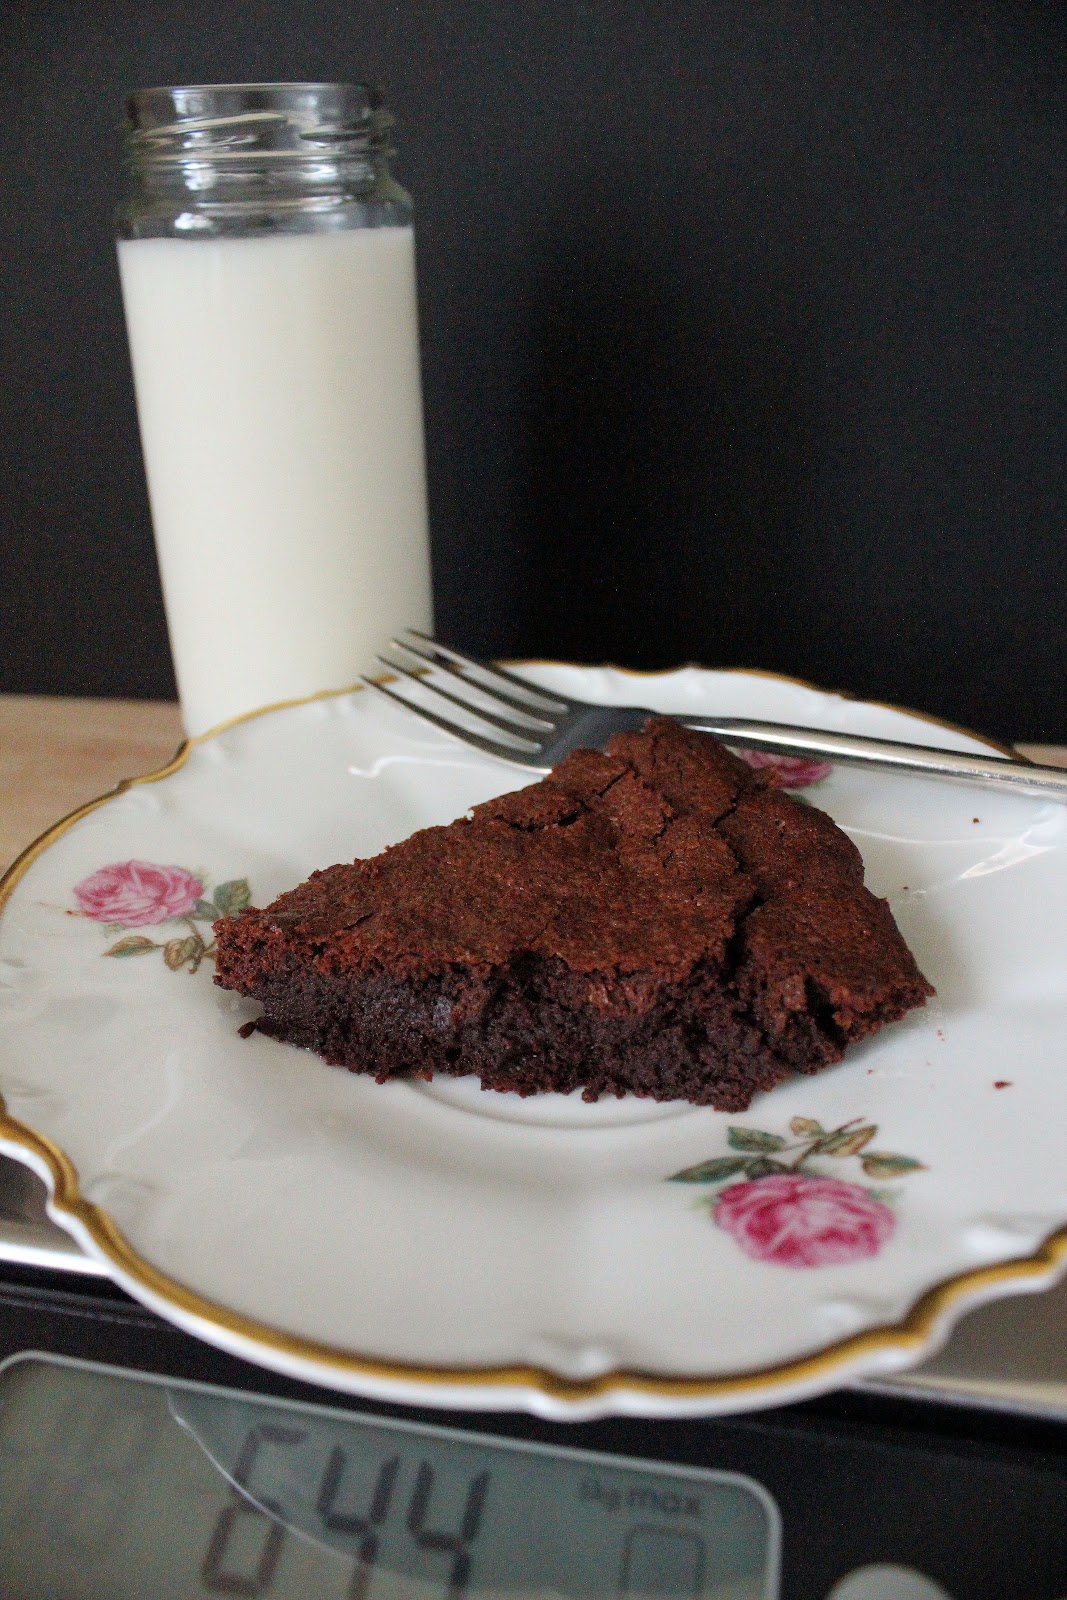
You can find the Flourless Brownie recipe here


Thursday, January 26, 2012

"Here There Be Monsters"


Alright. Hold your breath. We're doing this.
 I've got my weapon and my body armor. 

We're wandering blind into the world of Gluten Free.

Gluten Free baking is terrifying. It has a thousand obscure ingredients with names that make grocery clerks walk away when I talk, and a very steep learning curve. Baking with wheat flour seems like something grandmothers do, it's dainty, traditional, time tested. Baking with Sorghum, Xanthan and Guar, seems more like making jet fuel from scratch in a laboratory. In essence; much too tricky for a girl who eats ice cream for dinner.  

But guess what, it's happening.

In truth, baking is baking is baking. Be it gluten free, dairy free, or vegan, we're all making tasty delights in an oven, it's just that simple. This information, however reasonable, doesn't stop me being phobic of sticking a pan full of batter in an oven and 30 minutes later, retrieving a flaming rocket with bloody nubs where my hands should be. 

What can I say, I'm a worrier.


The very first gluten free recipe I ever tried was for gluten free vegan hockey pucks biscuits. It was... unpleasant. I came to realize that trying to tackle two new areas at once was too advanced for me to accomplish, so I told no one and double bagged the garbage. Skip ahead a few months and you'll find me once again optimistically bouncing around google, looking for a beginner level gluten free recipe to try. I got kind of upset though, when it seemed like this was all I could find;

Basic Gluten Free Pound Cake (SOOO EASY!!!) 
1/2 pound (2 sticks) Moon Rocks, softened
1 Eye of Newt (freshwater only)
2 teaspoons Red Grass of Gallifrey
4 large Bald Eagle Heads, at room temperature
2 cups Nettle flour, ground underfoot at midnight in a graveyard

Anyone have a babel fish? I had NO IDEA what I was looking at.What are all these things? I see 'flour' attached at the end but why are there so many different kinds? Too confused to even google the answer to this problem, I blindly did what any bewildered newbie would do, I went to Amazon and filled my digital shopping cart with one of everything.

Your subtotal before shipping is $108. 

Crap.


Alright, round two. Let's consult Shauna. In case you didn't know, she's the gluten free Oracle of Delphi. She's also a Leo, Leos are magic. They ask questions all the time so they know everything. Ever watch Good Eats? Alton Brown = Leo.

Anyway after spending a few days reading most of her backlog of blog entries I found myself much more informed about all this jet fuel and space language but I was once again overwhelmed with options, and I still didn't quite know what I was doing.

So, I secured my helmet, loaded my weapon and climbed deeper into the crevasse.


I picked five flours to try, more or less at random. They were ones I'd seen turn up in most of  the recipes on Shauna's blog, so I took a chance and ordered some.

When they all arrived, I lined up each little bag all in a row and stood there.What next?

I flipped each bag over, read the little summary printed on the back of what was inside and what it was like, what it did, etc.WHAT NEXT?!

When I got to the last bag in the bunch, I found printed on the back label a recipe for pound cake. It was simple, and it called only for things that I had.

I didn't look up reviews, or worry about what was in it. I didn't freak out, or over think it, I just followed the recipe, stuck it in the oven, and waited (with weapons ready).

It was delicious.

We polished it off in two days, and it contained no test tubes or sporting equipment (as far as I know).


Fellow explorers of the gluten free world, if you're just starting out like me, I'll go ahead and tell you that I don't know what I'm doing. I still don't quite know what I'm looking at. But we've made it to our first camp safely. And I can assure you with good conscience, that this recipe won't make a hockey puck.

You know, if that's any help.

Gluten Free Pound Cake

1 cup Sweet White Rice Flour
1/2 cup Sorghum Flour
1/4 cup Cornstarch
2tsp Baking Powder
1tsp Xanthan Gum
1 cup Butter, room temperature
1 cup Granulated Sugar
4 Eggs
2tsp Vanilla extract (did you know, you can make your own?!)

Beat the butter until cream and smooth. Add the sugar and beat into the butter until light and fluffy,  about 5 minutes. Add the eggs, one at a time, mixing well after each one. Add the vanilla and blend until completely incorporated.

In a separate bowl, combine the flours, cornstarch, xanthan gum and baking powder and blend together with a whisk. Add the dry ingredients to the wet and blend until fully mixed. Spread into a greased 9 inch bread pan. Bake for 60 minutes at 350 degrees. Cool for about 10 minutes. Remove cake from pan and cool completely.


Thursday, January 5, 2012

"Operation Pie Attack!"


Am I the only one having trouble starting forward motion on my new years resolutions?  I don't really know where to begin. I've got some ideas but it just seems like January flopped down at such an inconvenient time to get it all together. I know  the holidays have all passed by, and that now is the time to start your diet and organization plans but school hasn't started yet and I'm totally not finished stress eating. How am I supposed to get it together when I'm still sneaking booze into my hot chocolate and having fantasies about sleeping in a bed of warm spaghetti?

I do have a plan though, to combat my sloth (because I actually love new years resolutions) I am making my lists and setting up my plans with an intended start date of January 23rd. Lunar New Year!

What? Don't roll your eyes!


Okay okay so maybe not. I may be lazy but I have been working on a few goals, I promise. #1 is to stop using plastic shopping bags ( I know, I'm soo late to that party), #2 is to upgrade to a nicer camera (come on tax refund!) #3 is to dive head first into the world of gluten free baking ( I have a sister, a niece, and an aunt who all eat gluten free, it's time to get on this), and #4 is something I'm calling Operation Pie Attack!


Operation Pie Attack is this, whenever there is a party, or a birthday, or they have a charity blah-de-blah at work I will show up and bring a pie (or cake if the situation calls for it). It doesn't have to be a fancy involved dessert or even be a big deal holiday. I'm going to bring a baked good to everything until 2013.


Why wasn't I doing it already? Well, here's this;
I am one awkward person at parties ( and honestly just generally in life). I'm nervous, and I say weird things and I spend most of my time out in public worrying about my breath situation and if there is something stuck in my teeth. Bringing a baked good opens you up to conversation/scrutiny which is exactly what I try my hardest to avoid, PLUS there's always the slim chance that someone will disillusion me by announcing that my pie sucks and punching me in the face ( yes I worry about this. What? DON'T LOOK AT ME!).

I'm determined to get over this, in fact it leads right in to my fifth and final resolution for 2012;

#5 Stop being afraid of being wrong/ making an ass of myself. Life is too short to waste time being timid or worrying about how you come off. If my pie sucks, it's okay. I'll just make a better one next time.


So as my very first step towards achieving this goal I brought an apple pie to new year's dinner at my grandmother's house. All my relatives were there and it was... terrifying.  I was still awkward of course, and a couple things went wrong, the apples were too tart and the top crust browned funny, but I lived. And I'm still living.


The awkward feeling is merely growing pains I told myself, and while I busied  my hands looking at the vast collection of knickknacks around the room trying to remain cool, look at what I found smiling back at me...

Fate, right?

2012 I've got plans for you, and they include pie.


Apple Pie

Crust: 
2 1/2 cups flour
1tsp salt
1tbsp sugar
1/2 lb (2 sticks) cold unsalted butter cut into 1/2 inch peices
1/2 cup water
3 tbsp cider vingear

Filling:
5 medium apples (whatever kind or combination you like) peeled, cored and sliced
1/2 tsp nutmeg
2tsp cinnamon
3 tbsp butter (cut into small bits)
1/4 dark brown sugar 
1/4 cup  granulated sugar ( you can adjust the sugar to taste as sweetening fruit isn't an exact science)
3tbsp flour
1 tbsp lemon juice
1 egg +1tbsp milk whisked together for an egg wash
Demerara Sugar

1.For the crust:
Combine flour, salt, sugar,  vinegar and butter in a food processor and pulse until it resembles coarse cornmeal. Then slowly add the water to the mixture a little at a time until it starts to come together. You may not need all the water or you might need up to a cup just watch your dough and see how it does.
Remove the dough from the processor and separate into two equal peices. Form each peice into a flat disk, wrap in plastic wrap and refrigerate for at least an hour.

1.In a large mixing bowl combine apples, nutmeg, cinnamon, butter, the sugars and flour. Pour lemon juice, over apple mixture and toss gently to combine.

3.  roll out the bottom crust to fit a 9 inch pie pan leaving about an inch of rolled out crust hanging over the edge. Then put that bad boy (pan and all) back in the fridge to chill. 10- 15 minutes.

4. Remove bottom pie crust from the fridge and spoon in apple mixture. Set aside (  I personally like to work with a slightly softer pie dough, but if you don't you can set it back in the fridge at this point.)

5. Roll out the remaining ball of pie dough so it's big enough to cover all those lovely fillings in the pie, and roll it over the top. Trim any extra dough hanging off the sides so both crusts make about a 1/2 inch lip.  Join the crust edges together and crimp them in your favorite way. Poke some large vent holes in the top (no exploding pies please) and paint that baby with an egg wash. Top with sugar and wrap the edges with tin foil to prevent burning.

6. Bake at 425°F for 15 to 20 minutes on a rimmed baking sheet on the bottom rack until crust just starts to brown. 

7. Reduce oven temperature to 350°F. Move the pie to the center rack and bake for 45-55 minutes more. Pie is finished when the apples are fork tender and juices are bubbling. Let cool 30 minutes before serving.

Thursday, December 22, 2011

"Like Gingerbread Houses For Lazy People"


I've gotten really into s'mores lately. I know it's totally the time of year to focus on things like buche de noel and gingerbread houses buuuuut here's the thing. They are soo much work. Okay fine. You're right. I don't know anything about buche de noel (other than it sounds fancy. Buche!) but I do know this, gingerbread houses are out.

You know why s'mores are better than gingerbread houses ( I honestly keep typing gingerdread houses)? Because you can eat the whole thing without any of that worry about destroying beauty because there's melted marshmallow all over everything anyway.

I know, join me on this one.


Okay, all right, I don't hate the idea of gingerbread houses. They are in fact very lovely works of edible art buuuuut, here's the trouble; when you make a gingerbread house it usually goes one of two ways.

1) you are in the first/second/third grade making a gingerbread house out of random candy with a milk carton of questionable hygiene as a base, and in the end don't actually eat any of it (because really, ew!).

or

2) you're a crafty artist type and you meticulously blueprint, bake up, and assemble an entirely edible masterful work of art that you then destroy by eating. Or you don't eat it at all (ever!) you just leave it in your house to act as a temporary air freshener.

Weird. It's just weirdness all around. People, don't waste candy. Make s'mores. This is happening.


I know right now that you're thinking of s'mores as a boring one trick pony for summer camps and 9 year olds, but dream with me a little. You know that urge you have to play with the Christmas candy? It is more than welcome here.

There are endless ways to dress up s'mores, it's much more than just marshmallow and chocolate. Think Reese's cups, think Andes mints, think pretzel twists. Oh yeaahh.


Want a little more hands on? Make your own graham crackers!  Feeling saucy?  Cut them into some fun shapes (I went for a button design).


What's that? No open flames around to toast your marshmallows? Make friends with your broiler (you won't be sorry).

Wash it down with some milk, drag out your favorite board game and you've got yourself one totally relaxing winter night.

Gingerbread houses.... pffft...

Monday, December 12, 2011

"Tale Of Tins, Biscuits and Bandits" Or "The Great Food Blogger Cookie Swap!"


This is a story of cookie tins, biscotti and how santa can suck it. 
Let's start with the cookie tin part.

You know what's a wonderfully old timey, awesomely retro thing to do this time of year? Mail somebody cookies! I have always wanted to do it, the idea seems so romantic to me, it makes me think of care packages, and military wives, and moms with kids off at college. And every year about this time, when they start putting out all the cute little cookie tins, and spices go on sale, and I'll Be Home For Christmas starts playing, I get this little twinge of disappointment when I realize that most of the people that I could give cookies to, live just around the corner. I know, poor me right?

Enter the Great Food Blogger Cookie Swap.

Around the end of October Lindsay of Love And Olive Oil mentioned the idea of having a cookie swap between food bloggers. This instantly struck me as an amazing idea. I did not however, sign up. I didn't even think to. My first thought was how interesting it would be to watch how it all turned out.With my blog only a year old and in many ways still basically a fetus, I figured it was something best left up to the seasoned cooks. But sure enough as the days passed and the October pumpkins made way for the siren song of Christmas tins, I started to reconsider. 


How amazing would it be to step a toe over the line between the interwebz and reality. To actually share the taste of the food we've all been making instead of just the pictures. It was terrifying, and exhilarating and giggle inducing all at once.  I headed back to Lindsay's page to find the signup sheet still open. I typed in my name, hit enter, and that was that.

Cue the biscotti...

As soon as I signed up I knew that this was the perfect opportunity to bake up those deliciously indestructible nutty delights, what better cookie to send through the mail?! It's like training wheels for first time cookie shippers. And believe me, I am a first timer.

I'd been wanting to bake my own biscotti for a while, something about it always seemed intriguing and fancy and cutesy, you know, because it's made for dipping in coffee. But I never got around to it before, a recipe more fancy or more chocolaty or more french would come along and make a supremely crunchy cookie seem like a project best suited to take the back burner. But it remained on my baking bucket list, and I thought about it from time to time, whenever I watched a warm mug of coffee send its lonely wisps of steam into the air, friendless...cookie-less...

Biscotti my love! Your time has come!


I chose a lovely old chocolate orange recipe from Bon Apetit  to guide me on my way to biscotti bliss, and one of the things that makes this particular batch of cookies so enticing ( apart from the dipping. Mmmm coffee) is that it's made with bittersweet chocolate and orange extract, so it totally tastes like a Terry's Chocolate Orange! Which, in case you didn't know, is also cutesy to the max. Match made in heaven, right?

Can we just take a minute and talk about these chocolate oranges? I'd never even heard of them until I my late teens (you couldn't even get them in the U.S. for the longest time), but when I finally tried one Ugh! They were so amazing!  And so weird! Even the commercials are weird (I love them almost as much as I love the candy)


Back to the cookies, one of the things I noticed when baking my own biscotti was that it was worlds away from the teeth cracking boulders I remember eating ( and enjoying, am I weird?). In fact they were a heavenly level of crispy, almost shortbread-like which makes me wonder how they'd fare snorkeling in a cup of coffee (and in hindsight makes me hope with fingers crossed that they arrived to their loving homes in one piece ?!). Yes, okay didn't actually try them with coffee. I know, what's wrong with me? That's the whole point, right? Out of the two batches I ended up making, I crunched down one or two (baker's spoils, you know ) three dozen were sent away in the mail, and the final ten were stolen away in the night by what I can only assume was Santa on a practice run. Or my boyfriend. But I'm leaning toward the Santa theory.


I wasn't cookie-less for long though, as part of the cookie swap I got three dozen more cookies in the mail (snickerdoodles, coco-choco-mini blondies, and peanut butter cookies mmmm) that were ALL crazy good! So good in fact that I stashed them away in the night to a secret hiding spot where Santa would NEVER find them. Give me coal all you want, dude, but you ain't gettin your furry mittens on my delicious noms. No sir!


Thank you ladies for sending me your delicious treasures, thank you Lindsay and Julie for hosting such an amazing event, and as for Santa... move along... nothing to see here...guy.

***
Chocolate Orange Biscotti
Originally Bon Appetit via Epicurious

Makes 2 dozen

2 cups plus 2 tablespoons all purpose flour
1 1/2 teaspoons baking powder
1/4 teaspoon salt
3/4 cup sugar
1/2 cup (1 stick) unsalted butter, room temperature
2 large eggs
2 tablespoons orange liqueur or 1 1/2 tsp orange extract
1 tablespoon grated orange peel
1 cup pecans, lightly toasted, coarsely chopped
6 ounces bittersweet (not unsweetened) chocolate, chopped
print a shopping list for this recipe


Line large baking sheet with parchment paper. Whisk flour, baking powder, and salt in medium bowl to blend. Using electric mixer, beat sugar and butter in large bowl to blend. Beat in eggs 1 at a time, then orange extract and orange peel. Add flour mixture and beat until blended. Stir in pecans and chocolate. Gather dough together; divide in half. Wrap in plastic and freeze 20 minutes to firm.

Position rack in center of oven; preheat to 350°F. Using floured hands, form each dough piece into 14-inch-long, 2 1/2-inch-wide log. Transfer logs to prepared baking sheet, spacing 2 inches apart. Bake until light golden, about 30 minutes. Transfer parchment with logs to rack. Cool 20 minutes. Reduce oven temperature to 300°F.

Place 1 log on cutting board. Using serrated knife, cut log on diagonal into 1/2-inch-thick slices. Stand slices upright on baking sheet. Repeat with remaining log.

Bake biscotti until dry to touch and pale golden, about 30 minutes. Cool completely on rack. (Can be made 1 week ahead. Store in airtight container.)

Wednesday, November 2, 2011

"Vanilla Stink Eye" or "I Swear I Never Touch The Stuff!"


How to make vanilla  extract

Step one, get the idea while browsing on Pinterest (in the middle of the night) head straight to the container store website and order the exact same cute little bottles.

Step two wait, wait, wait for the bottles to be mailed to you.

Step three, finally get the bottles in the mail and realize that you're totally dumb and ordered the 10 ounce bottles instead of the 1 ounce. Rail at decimals for a while but move on.

Step 4, head to the liquor store at 9am because you work nights and that's the most convenient hour. Sound like a total lying wino when you tell people that "it's just for vanilla extract" and you "don't even really drink". Make sure that you overbuy and choose the largest bottle you can find so that when the clerk rings you up and puts the giant booze bottle in a brown paper sack you'll be sure to look classy with a capital 'K'.


Alright, so I had a few problems getting started on this project, but making vanilla extract is actually really easy. All you need is high proof liquor ( I used vodka), some vanilla beans and a container that seals up tight.


Step 1, gather yo stuff. You need three vanilla beans per 8 ounces of vodka. You can make a ton if you like but I just made 2 cups worth this time.

Step 2, split your vanilla beans down the middle, leaving about a half inch of uncut bean at both ends (so it looks like a canoe)


Step 3, place 3 vanilla beans in a container ( with a tight fitting lid) large enough to hold a 8 ounces of liquid and fill 'er up. As it turned out my oops bottles from the container store were actually the size I needed after all, if I'd gotten the teeny tiny ones I would've had to wait to use them.

Step 4 put the lid on, give it a good shake to let the booze and the beans get all cozy, and set the bottle(s) in a cool dark place for at least two months. Give it a shake every week or two to keep things lookin right. After your two months are up, it should be ready to use.

It should also be a lovely shade of brown by then, but this is my first batch (so it's still a baby). I'll update you in two months (when my baby grows up).


Happy baking!